
Anime-Look Cel Shading in UE4
Unreal Engine 4 is a great game engine that comes with a fully node-based material editor that enables us to create various shaders without writing even a line of code. I tried creating anime-look cel shaded images using only the material editor (no engine customization!) and got a pretty decent result, so I’d like to share the process.
Contents
Overview
In order to create anime-look images, basically we need to accomplish
- Cel shading(Banded lighting)
- Edge detection.
Let’s take a look at them one by one.
I use Pronama-chan FBX in this tutorial. If you wish to use it, please read its license.
Cel Shading
Banded Lighting
Cel shading is a type of shading where the lighting is rendered as a band or multiple bands of colors instead of gradation of colors to create stylized and flat images. Here’s a great tutorial for cel shading in UE4: Cel Shading Post Process. In this tutorial, cel shading is done by creating a post-process material which extracts the lighting from the scence and uses a lookup table texture to band the lighting. I used the exact same method for cel shading.
Following the tutorial, I created a post-process material “PP_CelShader.”
(Please right-click on the image and select “Open image in new tab” to see bigger images.)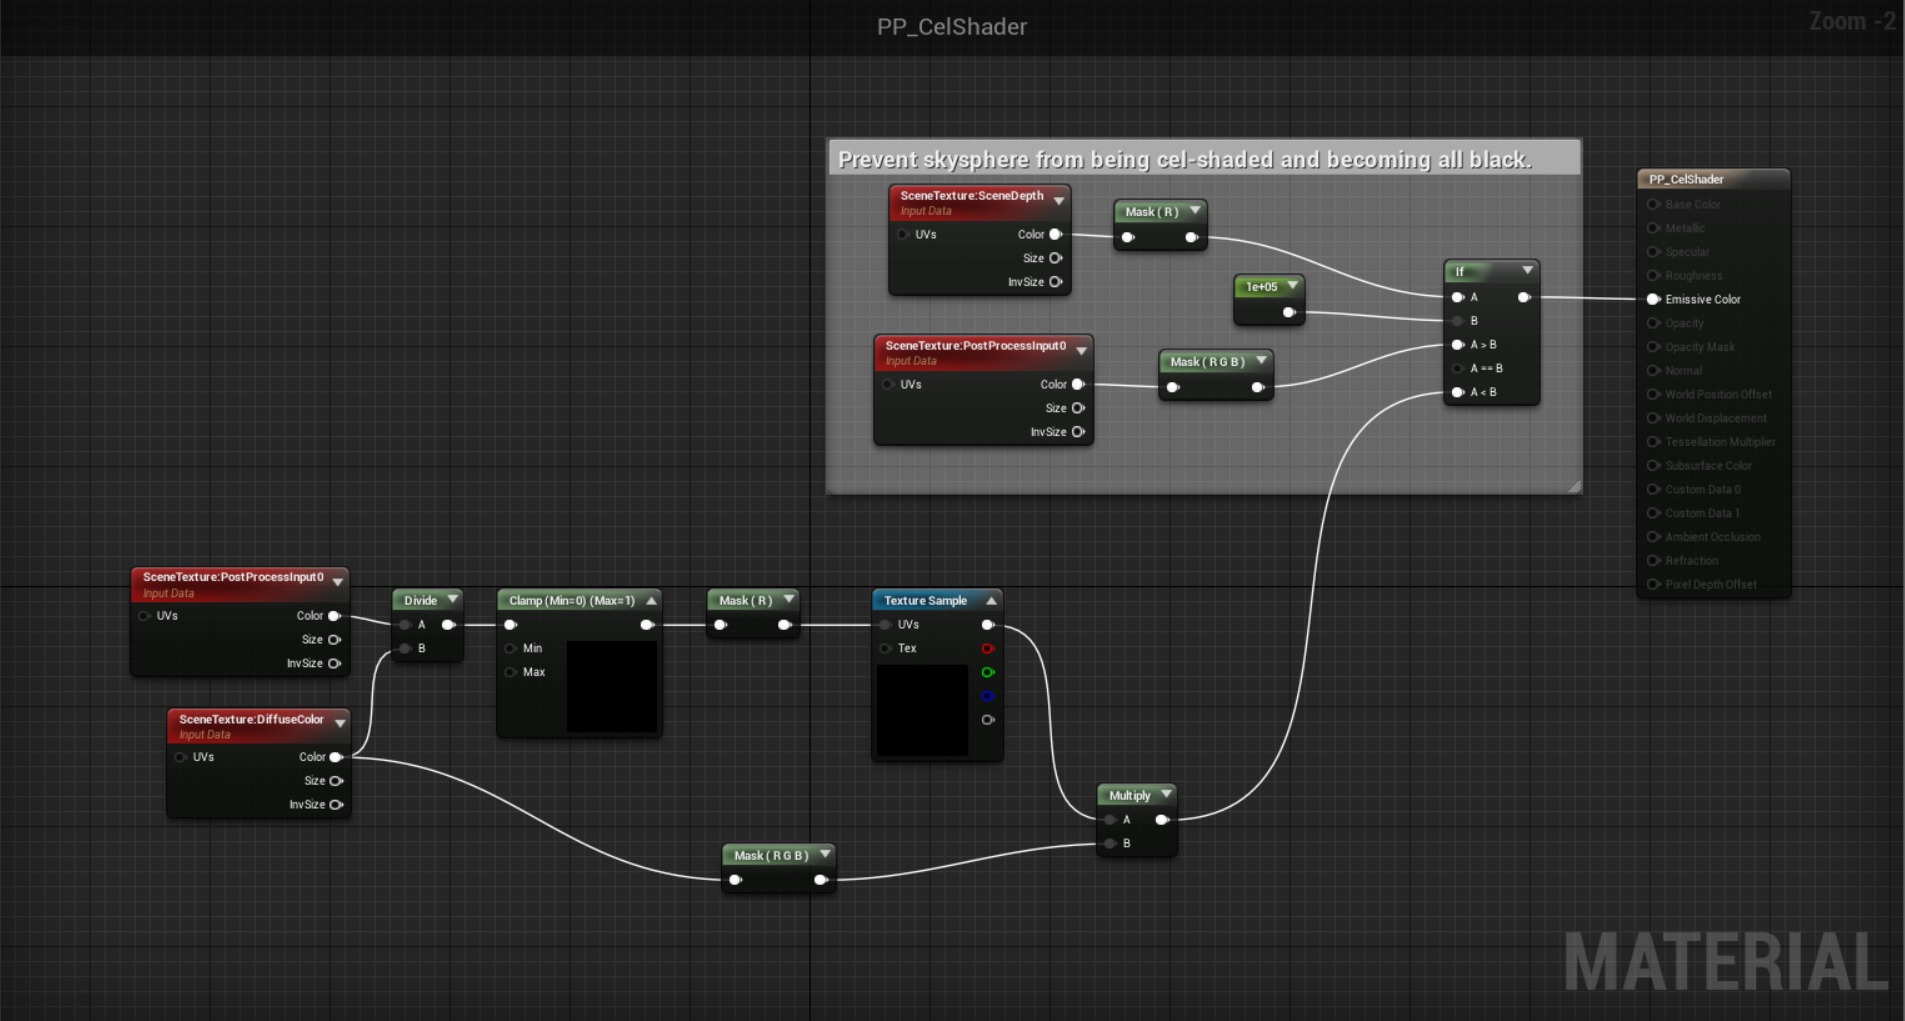
As the author of the tutorial mentions, any materials that are in this cel-shaded scene need to have
- Roughness value of 1
- Metalic value of 0
- Emmisive value of 0,
and make sure you have a post-process volume in the scene that is set to “Unbound” and has a Bloom intensity value of 0 and both min and max brightness value under Auto Exposure of 2. Also, you need to set Blendable Location to “Before Translucency” in the material’s details tab.
The image below is the lookup texture that is used in the texture node in the post-process material. It’s extremely narrow as its size is 1 x 128 px.
Import this lookup texture into UE4 and go to the settings panel. Under Texture section, you have to untick sRGB, set both X and Y tiling method to “Clamp”, and change the filter to “Nearest.”
If you want to adjust the threshold of light bandings or add more bands, you can do so by modifying this lookup texture.
If you import the Pronama-chan model to UE4 and set the textures to the materials without any additional settings, it should look like the screenshot below. This kind of models tend to look like anime figures when they are rendered with PBR.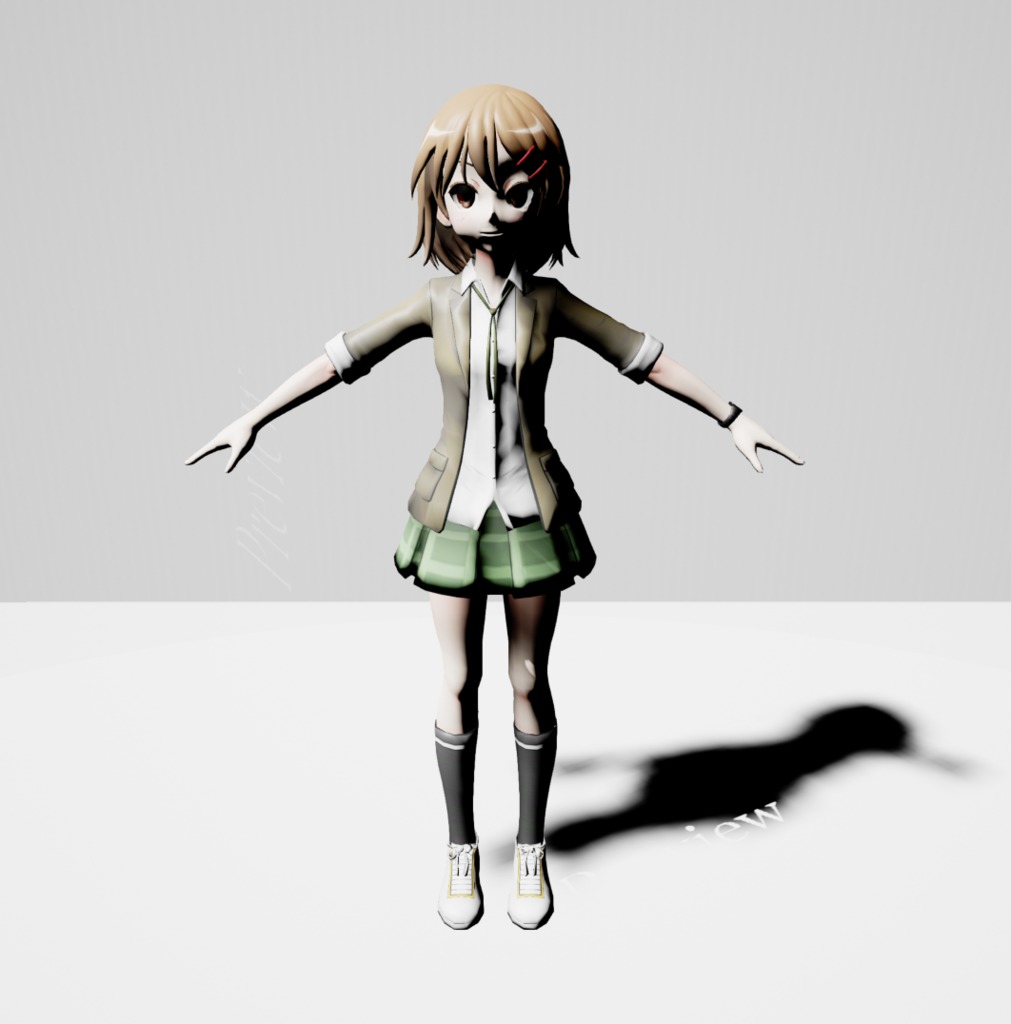
Now let’s apply the post-process we just created.
The screenshot below is the result. The lighting is broken down into a band and thereby it’s binarized.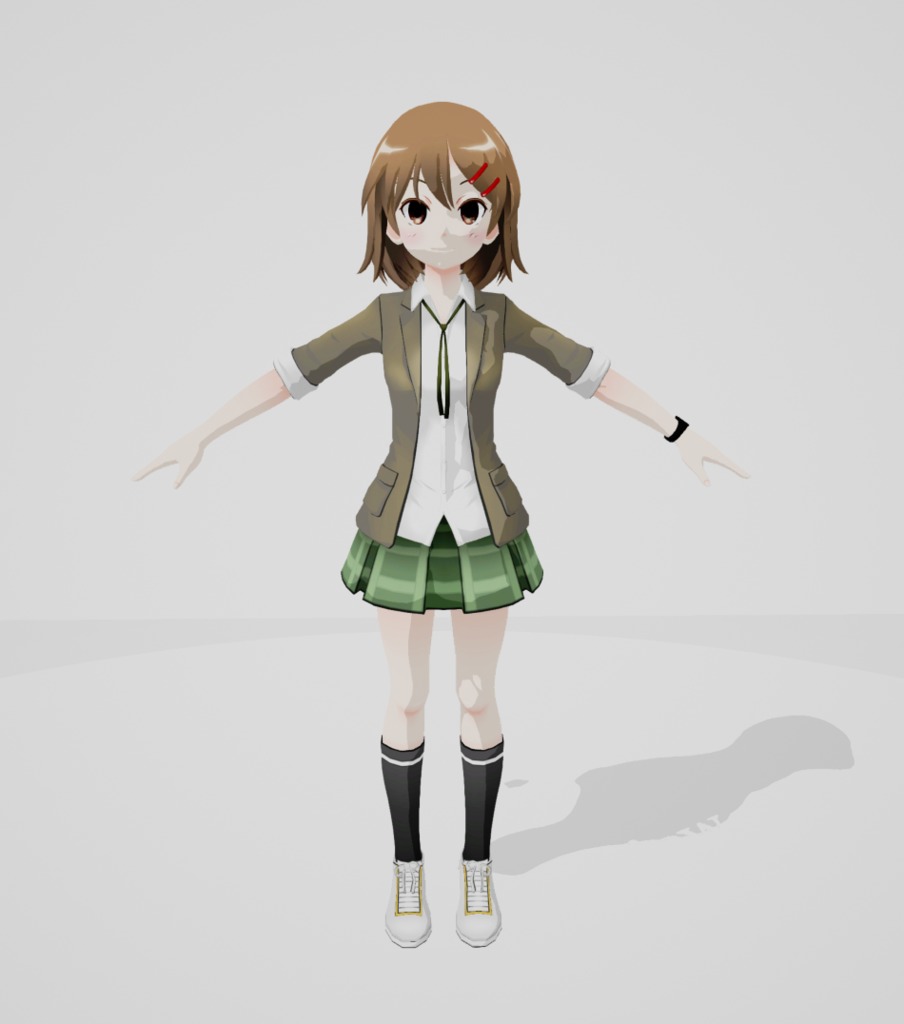
Rim Light + Highlight
Now that we have a cel-shaded image, but it isn’t looking very like anime. We need to add some more effects. The effects include rim light and highlight.
I created two material functions, “MF_ToonRimLight” and “_MFHairSpecular, then used those functions to create “M_Toon”, a material that adds the effect of rim light and highlight to objects.
(MF_ToonRimLight)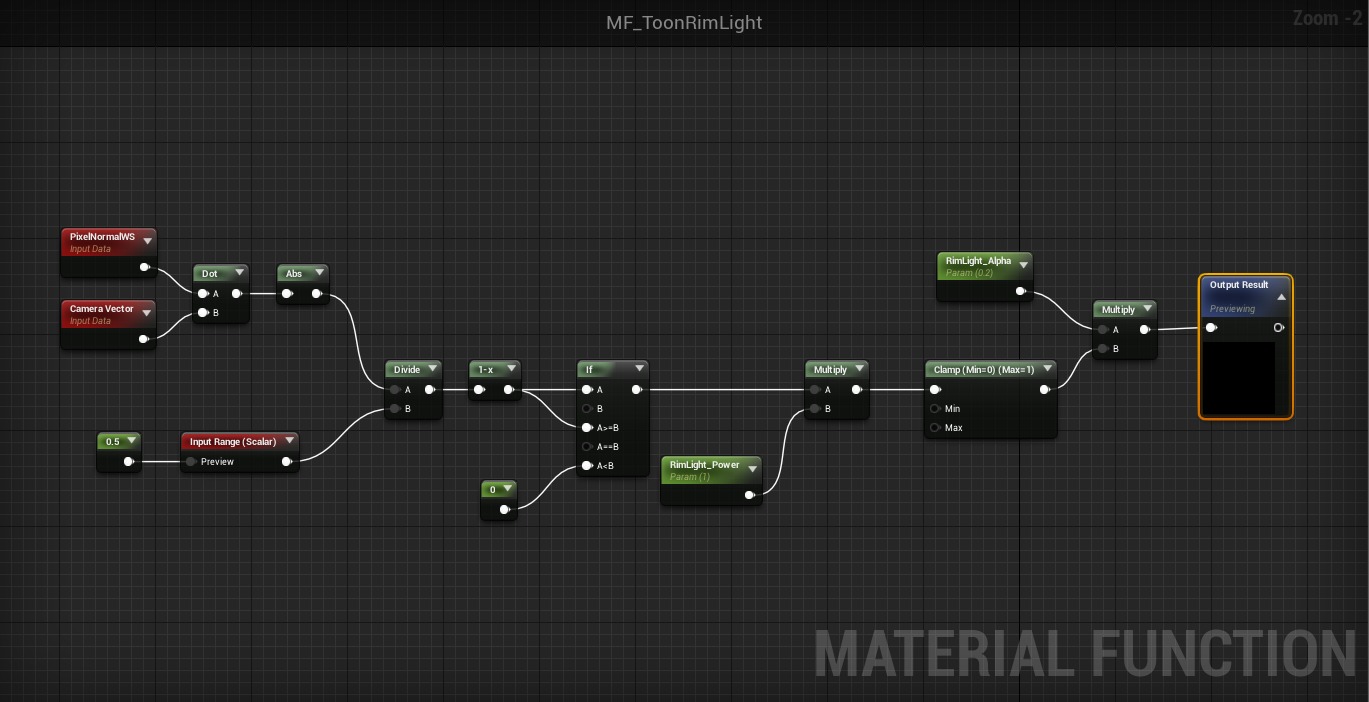
(_MFHairSpecular)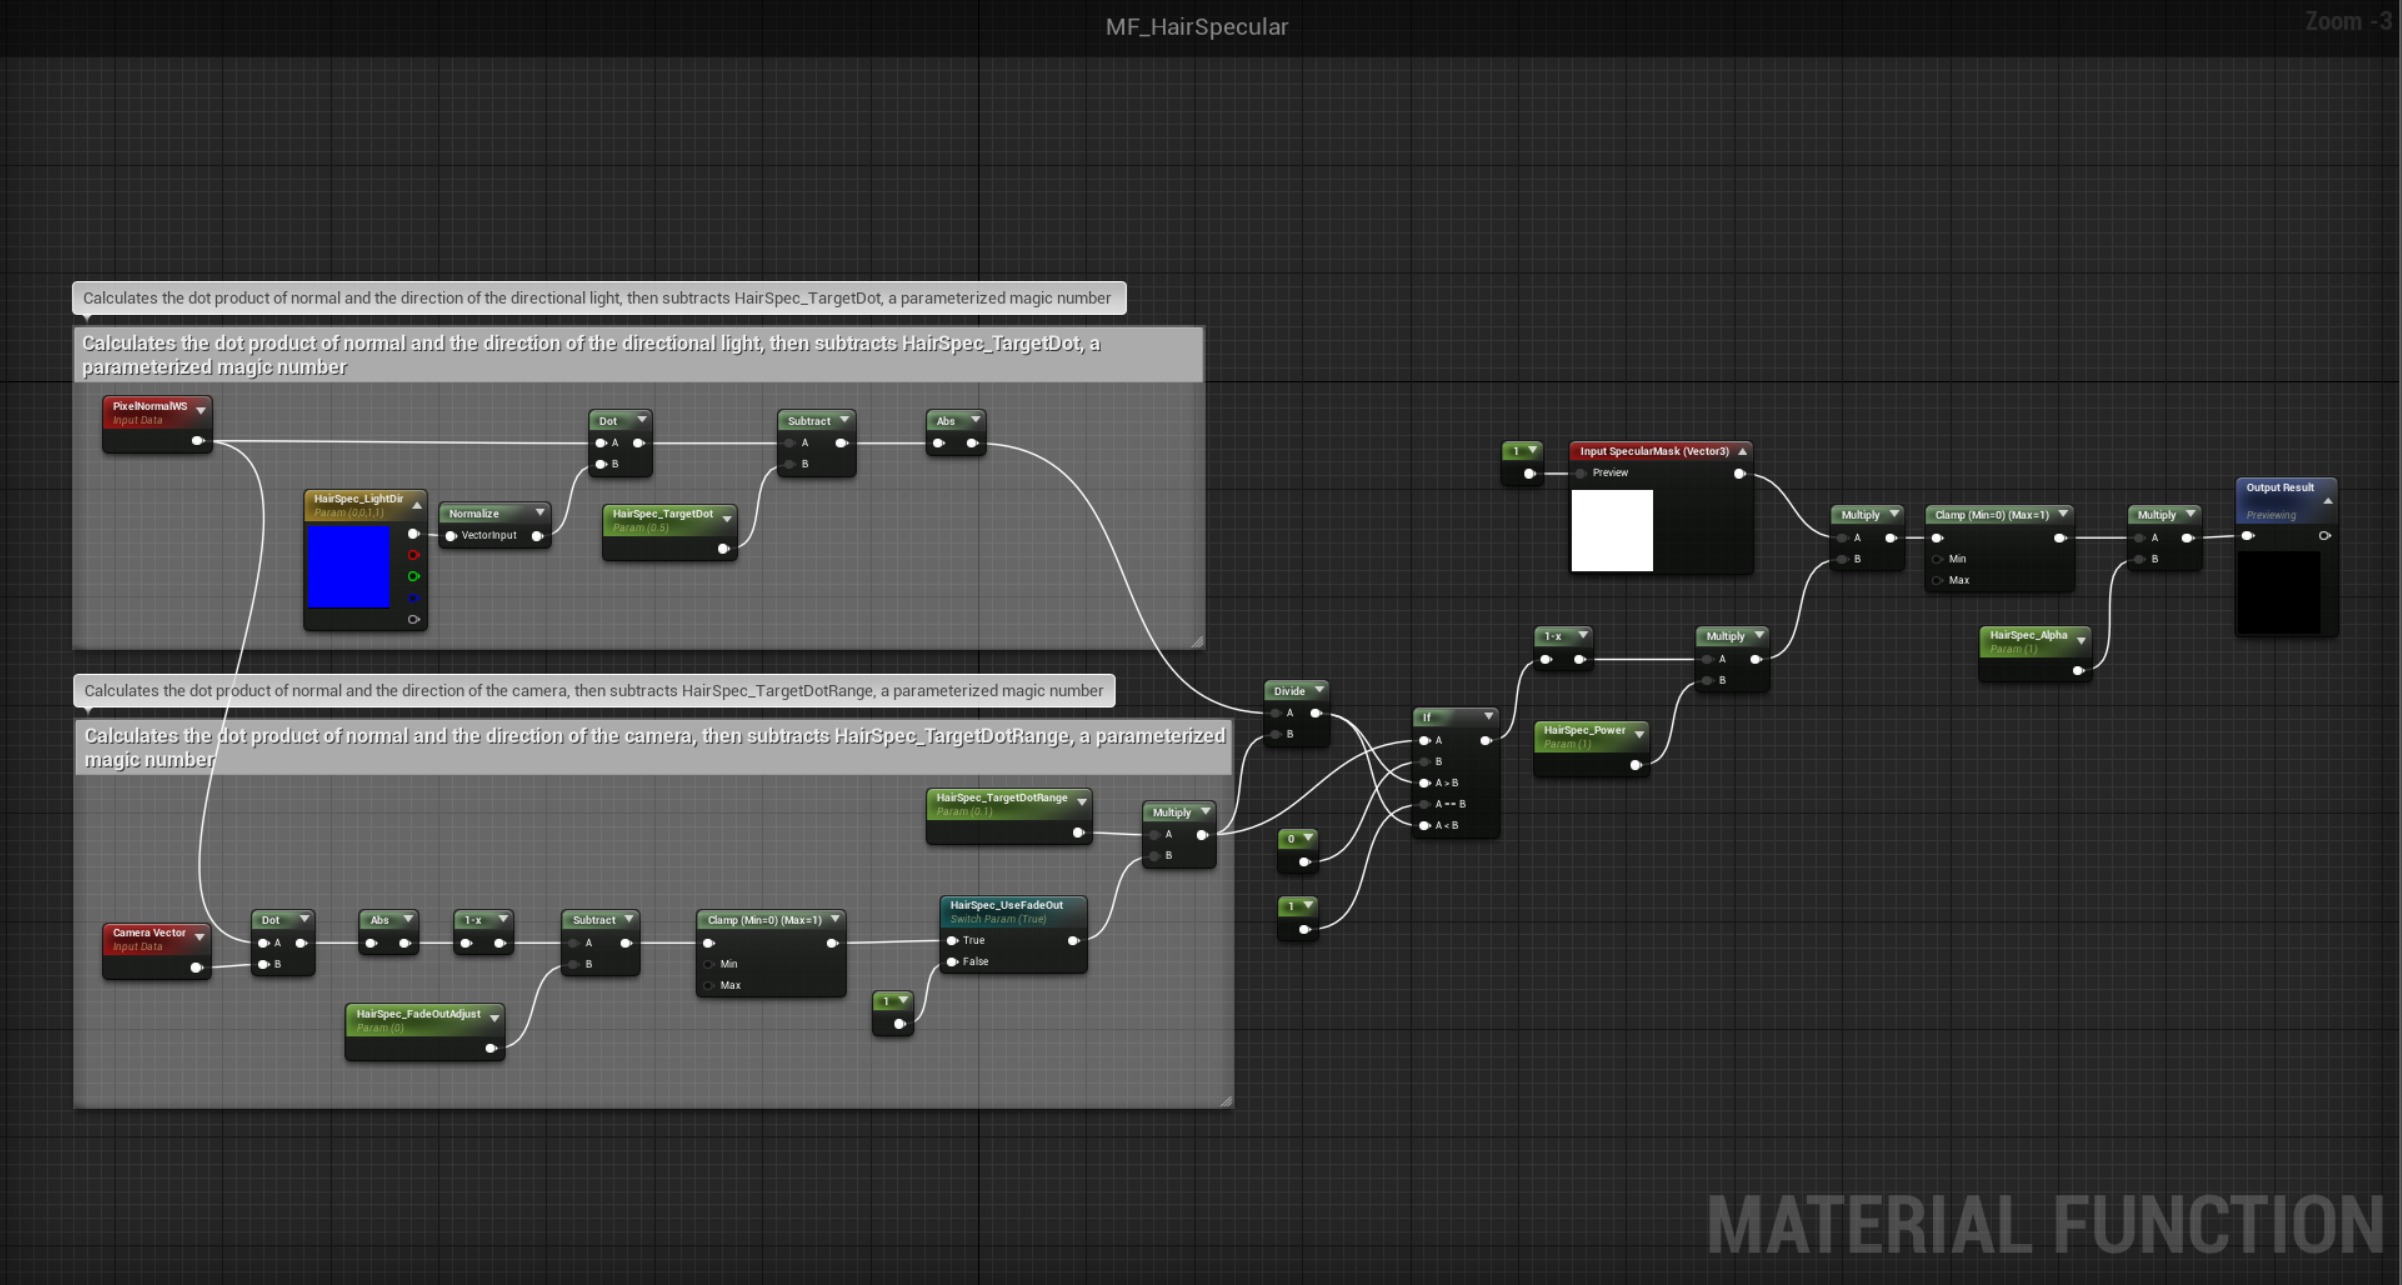
What these functions do is fairly simple. Both utilize the dot product of normal and the direction of the camera (and the directional light) to determine whether or not one pixel on a surface needs to be highlighted. Note that the direction of the directional light is expressed as a vector named “HairSpec_LightDir” in “MF_HairSpecular” as materials don’t have access to light information.
“M_Toon” just takes a base color map and adds rim light and/or highlight to it. You can change the texture node to a color node so that you can have a material of single color, which is good for a character’s hair and skin.
(M_Toon)
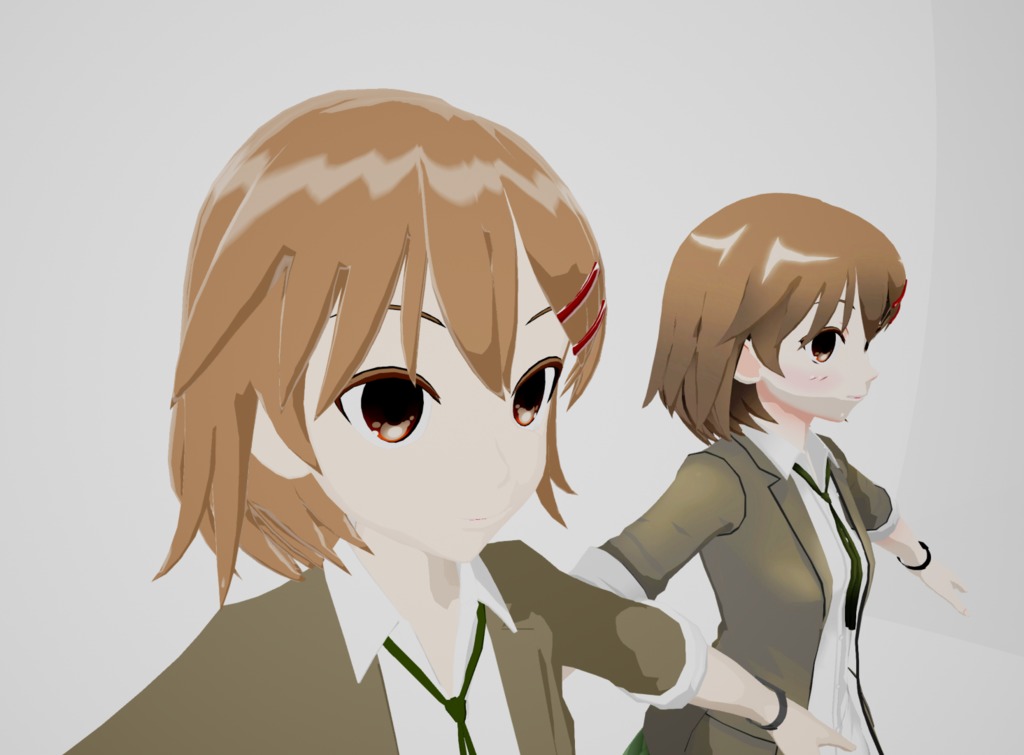
Here’s the result of rim light and highlight on the hair.
I created a material that has a color node instead of a texture node and used it with the parameters shown below:
HairSpec_Alpha: 0.183
HairSpec_Power: 2.320
HairSpec_TargetDot: 0.492
HairSoec_TargetDotRange: 0.1
RimLight_Alpha: 0.2
RimLight_Power: 1.0
Modifying Textures
To make the image more anime-looking, we can modify textures. In general, coloring in anime is pretty simple, and gradation is not used very often.
(Original texture)
(Modified texture)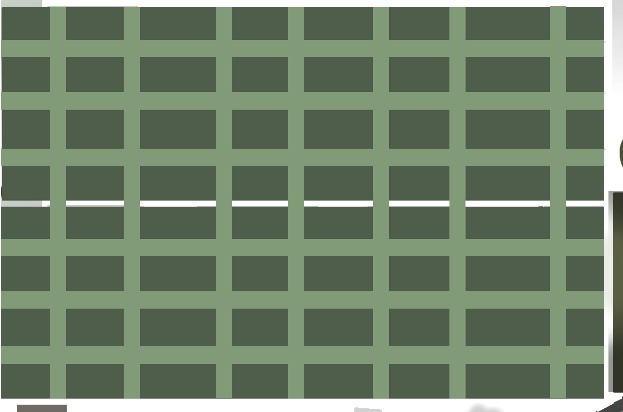
(Rendered with modified texture)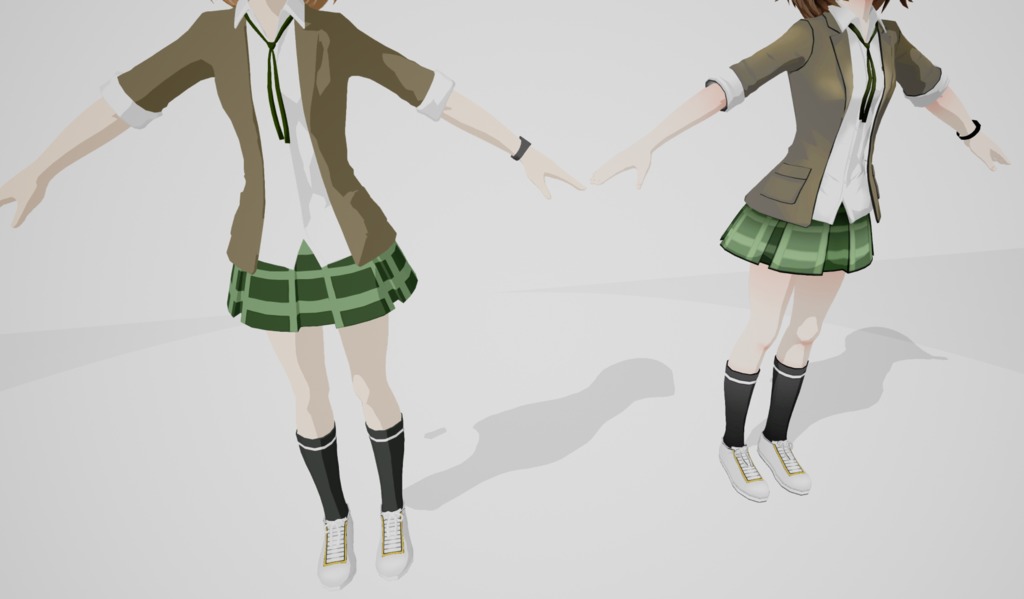
Edge Detection
Laplacian Filter
Now, we tackle one of the most essential things, that is edge detection. One simple thing we can do is implementing Laplacian filter. Filtering in image processing is a method to modify or enhance some certain features of images. Laplacian filter is a filter used to detect areas that show rapid change, which are edges.
I created a post-process material “PP_ToonEdge” that applies Laplacian filter to normal and depth to detect edges, mixes them together, and add the edges to output images. This material also allows us to exclude objects from edge detection by changing their custom depth stencil values. If you set the custom depth stencil value of an object to 1 or greater, this post-process draws edges around/on the object.
(PP_ToonEdge)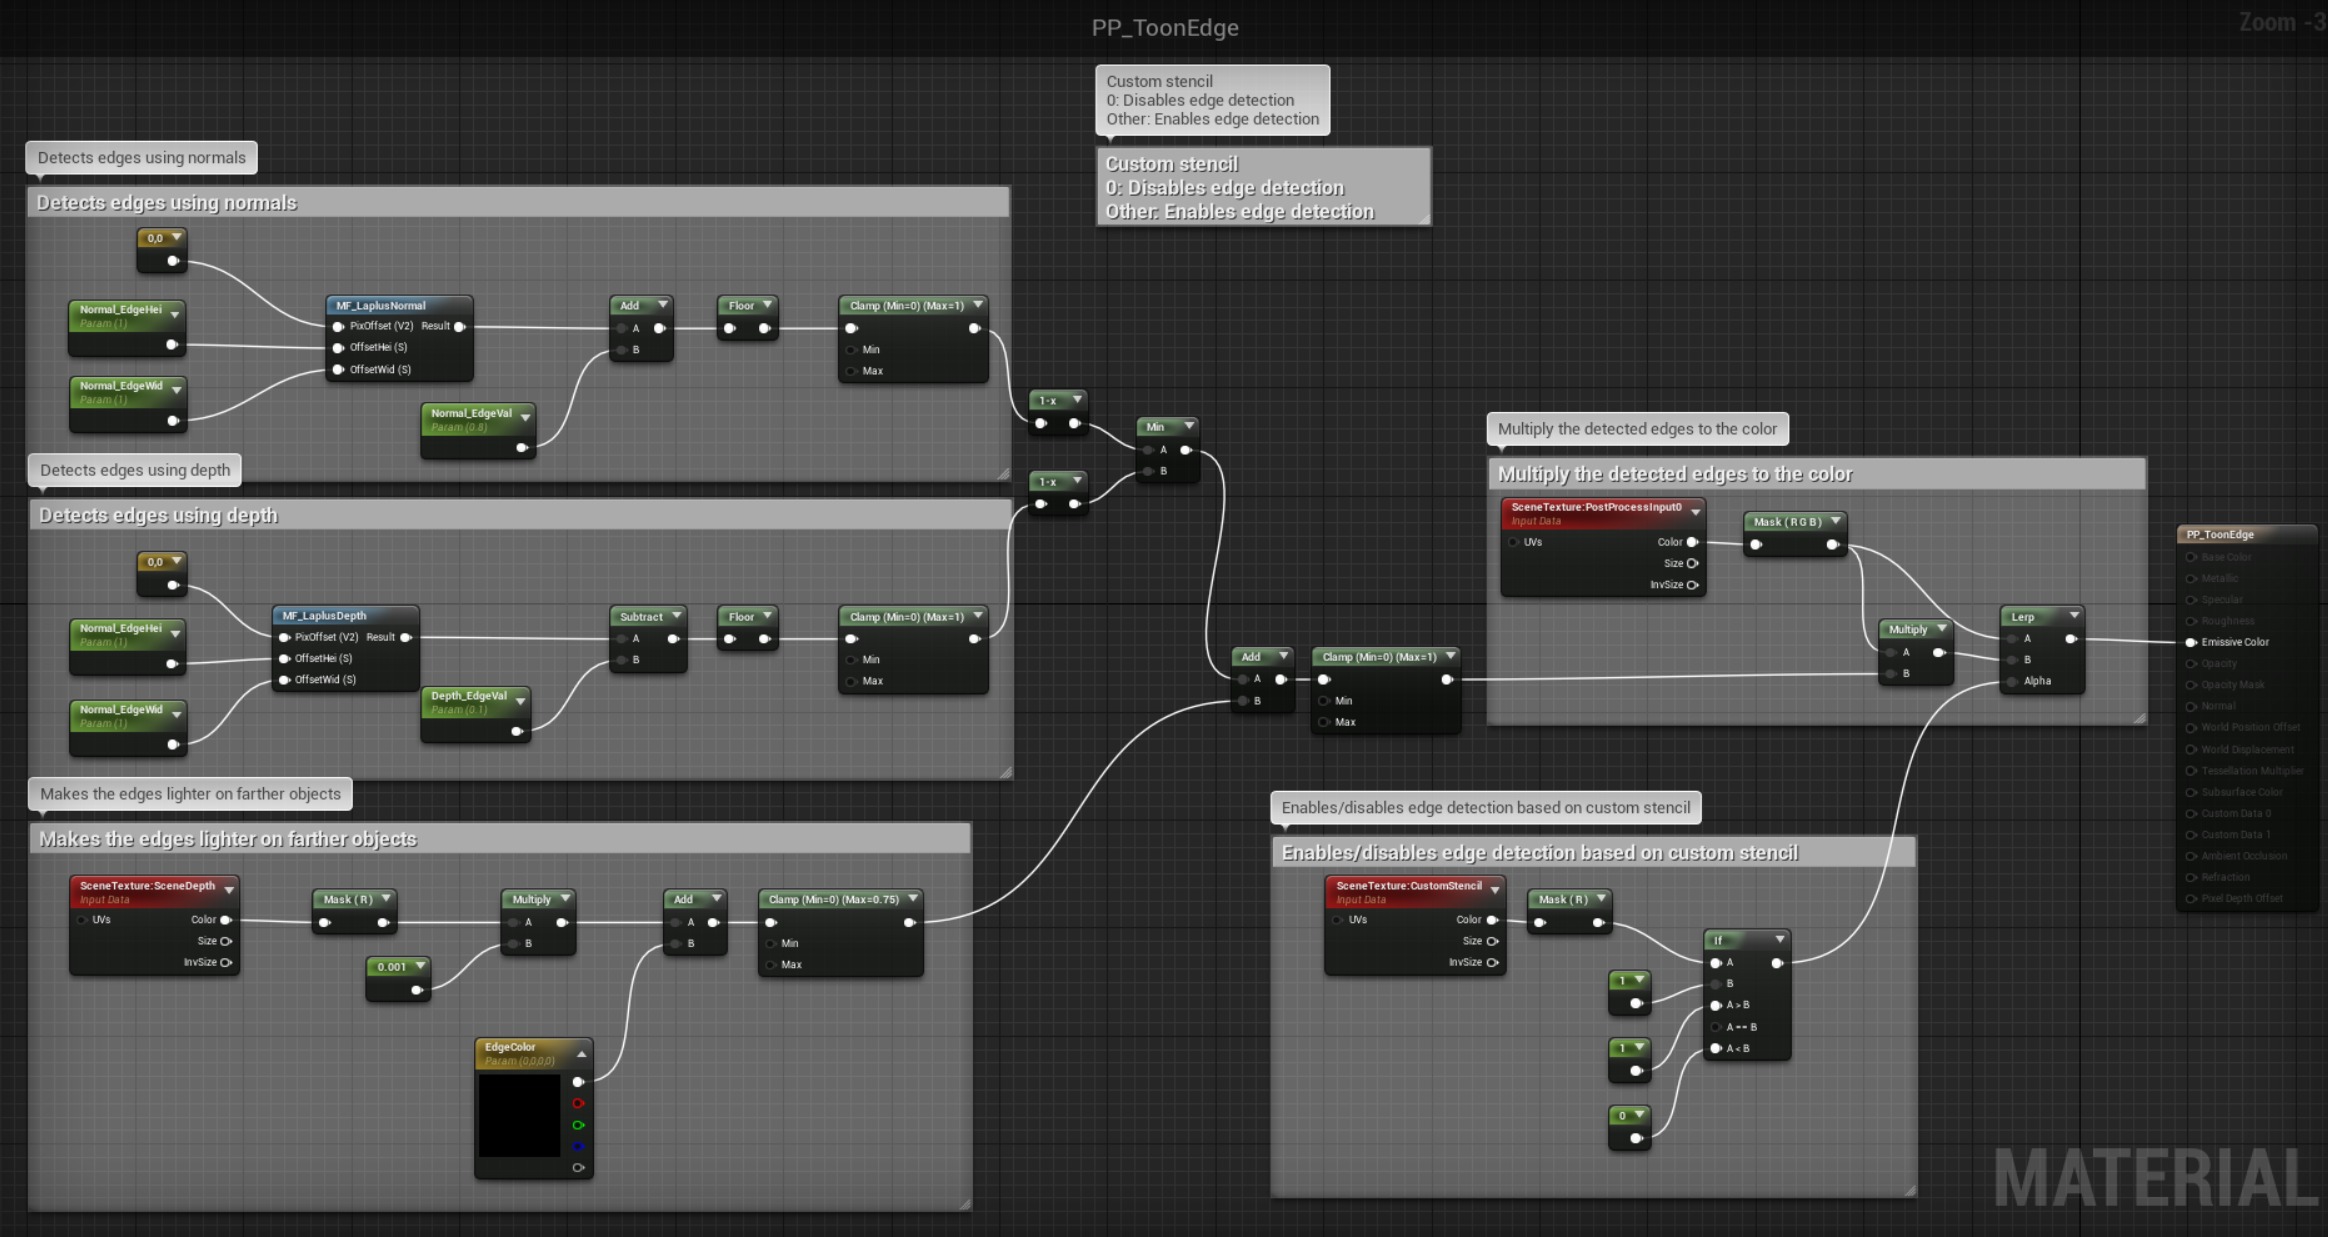
(Rendering configuration for edge detection. You need to set the custom depth stencil to 1 or greater.)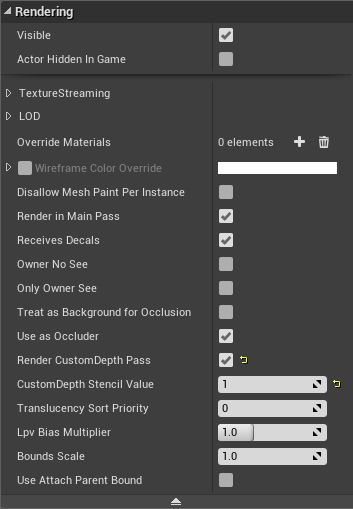
Here’s the material functions for Laplacian filter. These functions are used in “PP_ToonEdge.”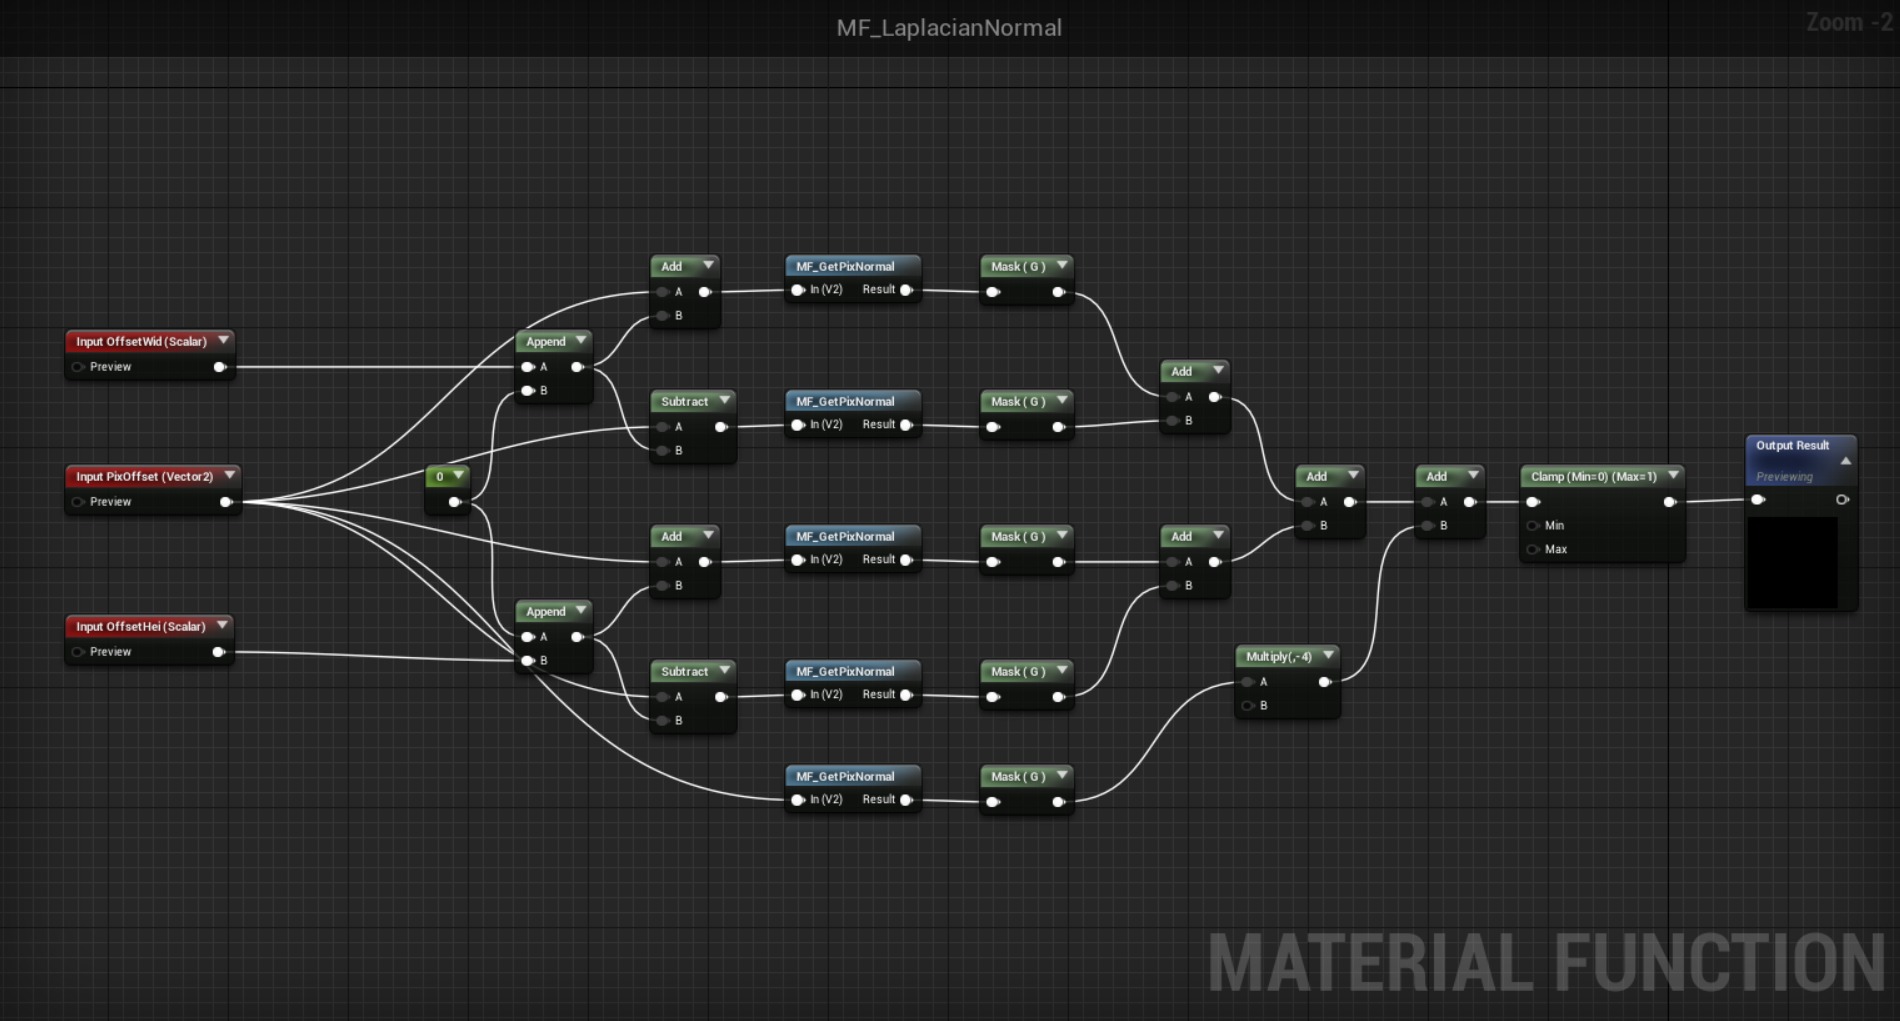
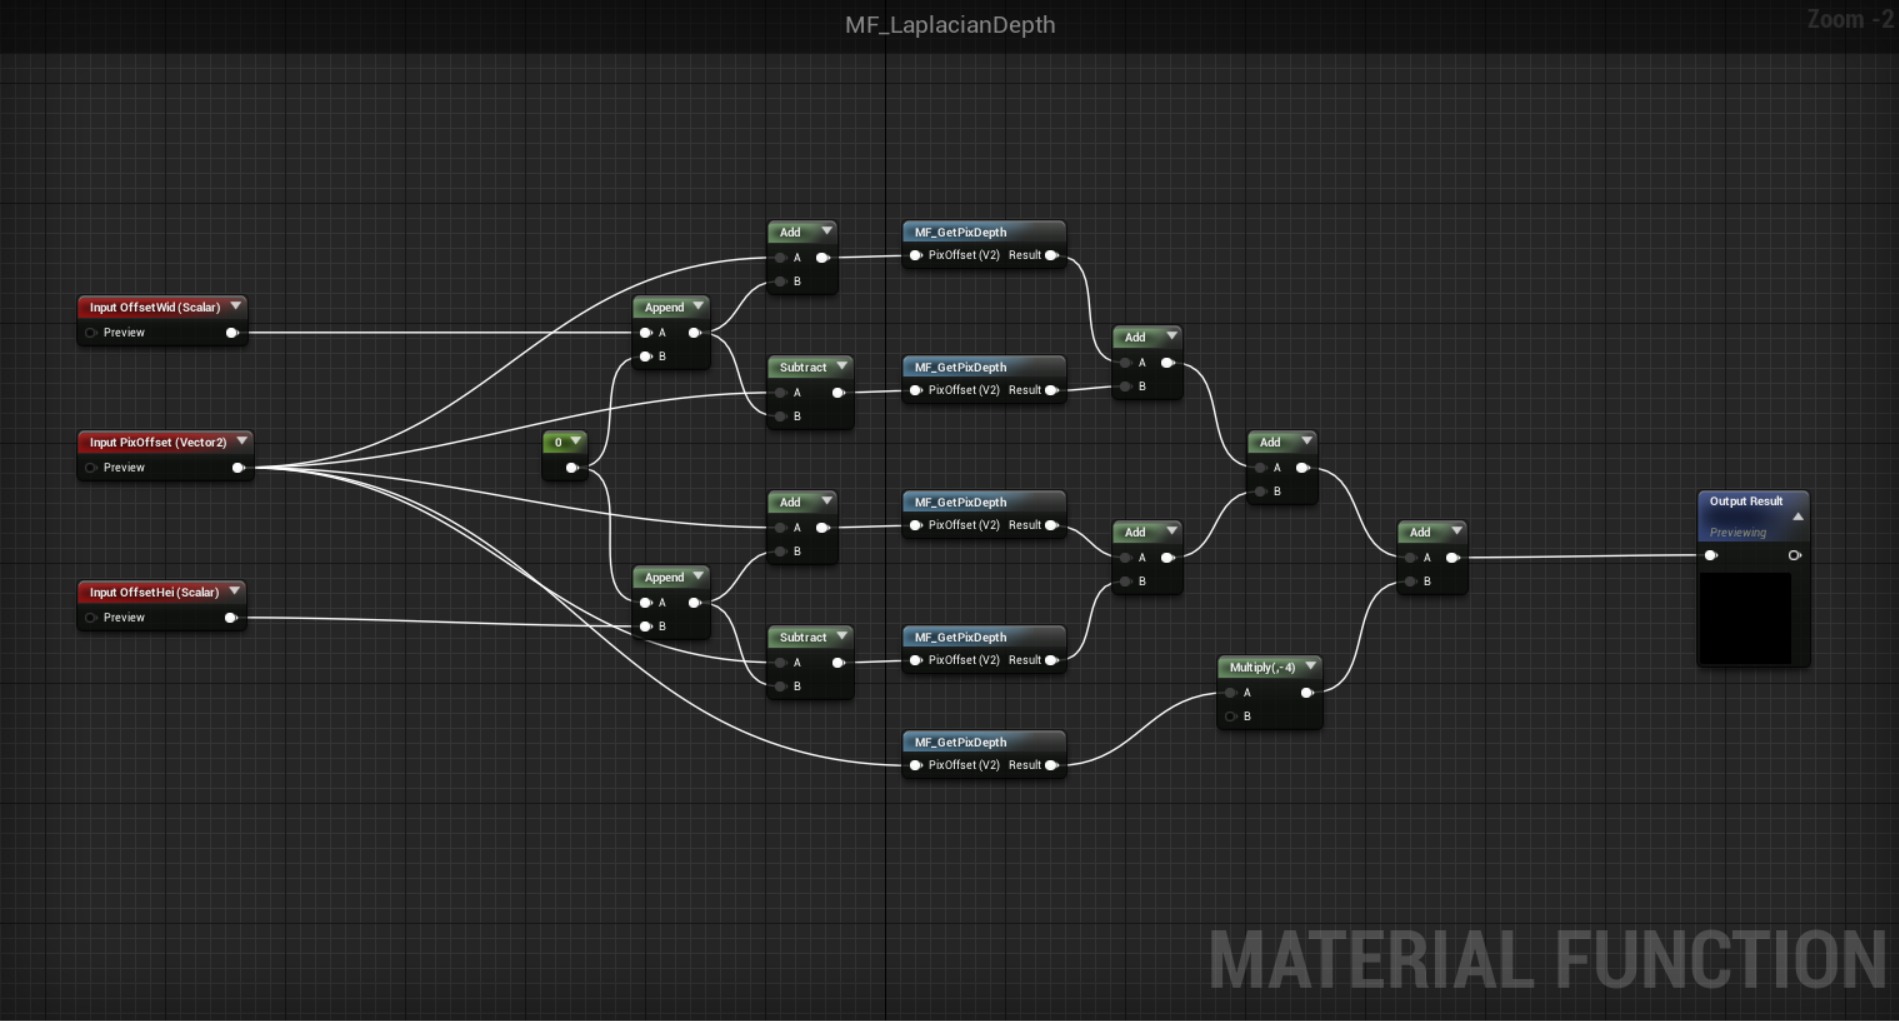
As the Laplacian filters need to access to each pixel, I created two material functions that access to single pixel of respectively normal and depth.![]()
![]()
Now that we have cel shading and edges!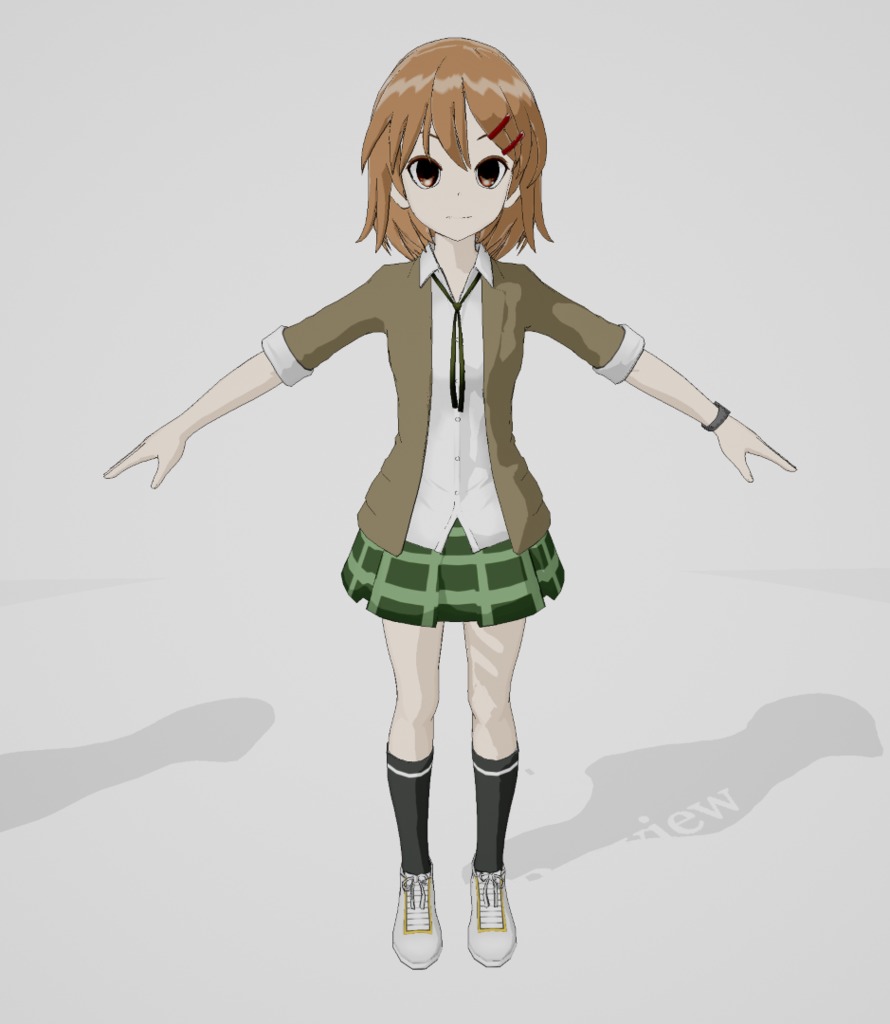
Modifying Meshes
The edges we just obtained are great, but they are sort of scratchy. In order to have more sharp edges, we can modify our models a little bit. Use Blender or some other 3D modeling software to open the model and modify it so that the model has clearer edges.
I added some edges on the clothes. However, this method may cause significant increase of number of vertices. We should also consider drawing edges directly on textures instead.
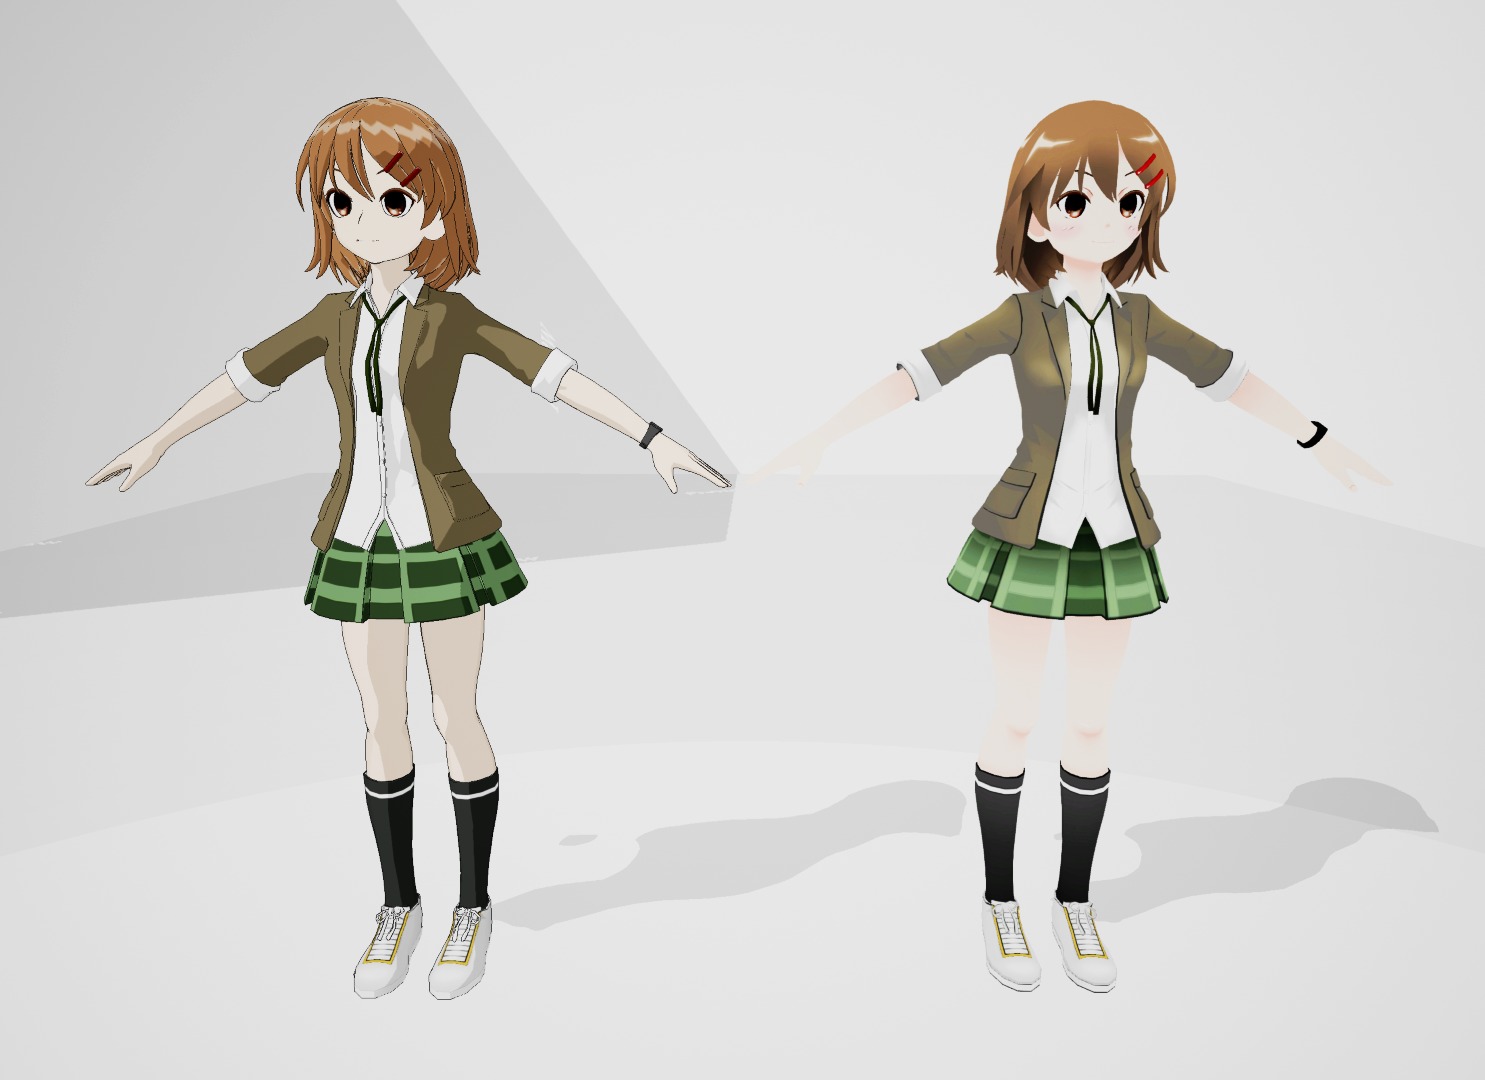
(Original model)
(Modified model)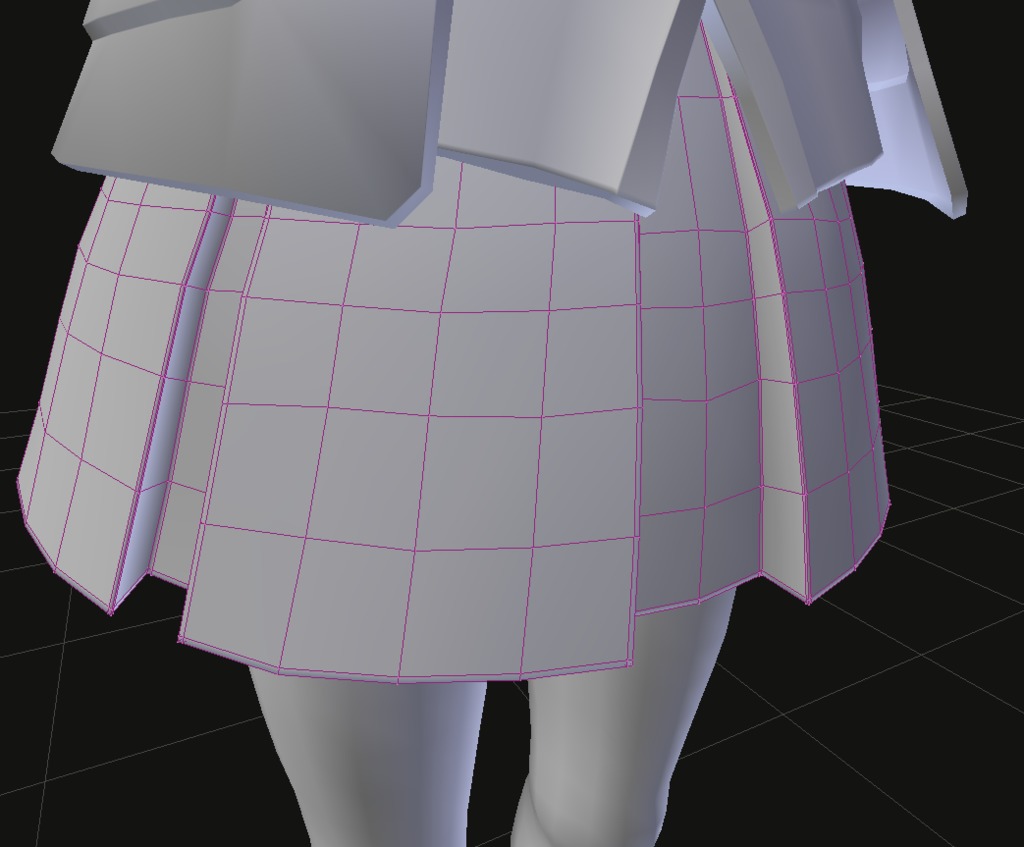
(Original model)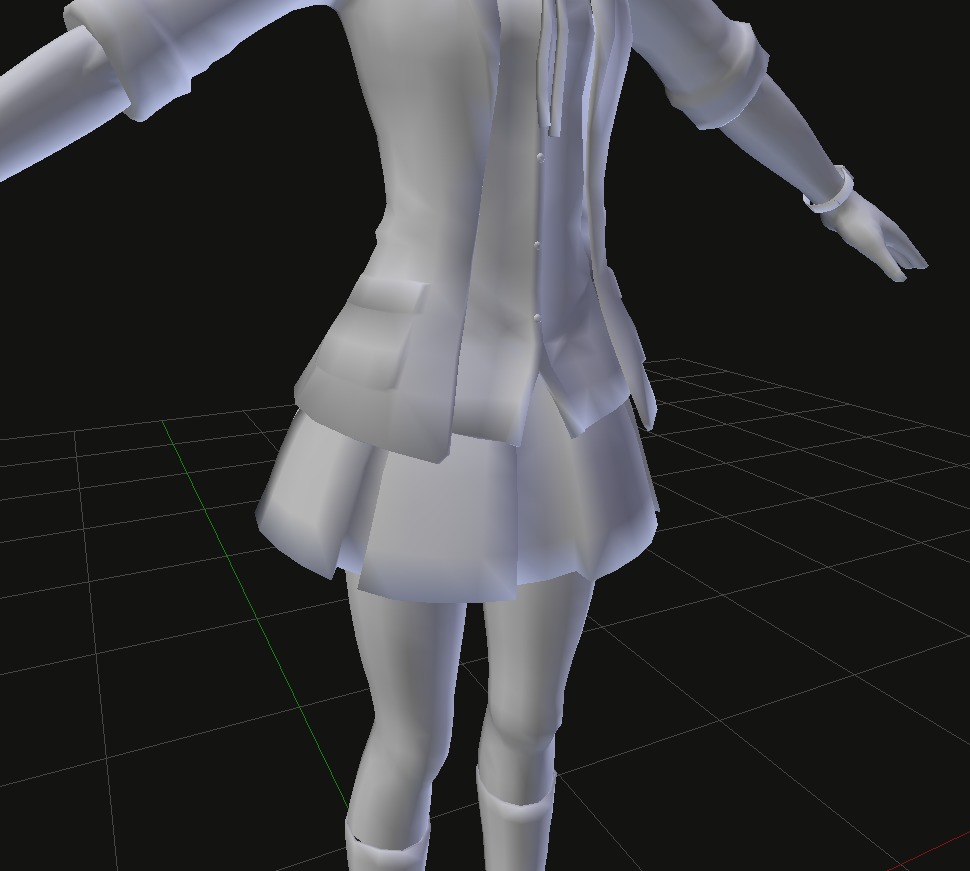
(Modified model)
With clearer and sharper edges, the model is now looking good.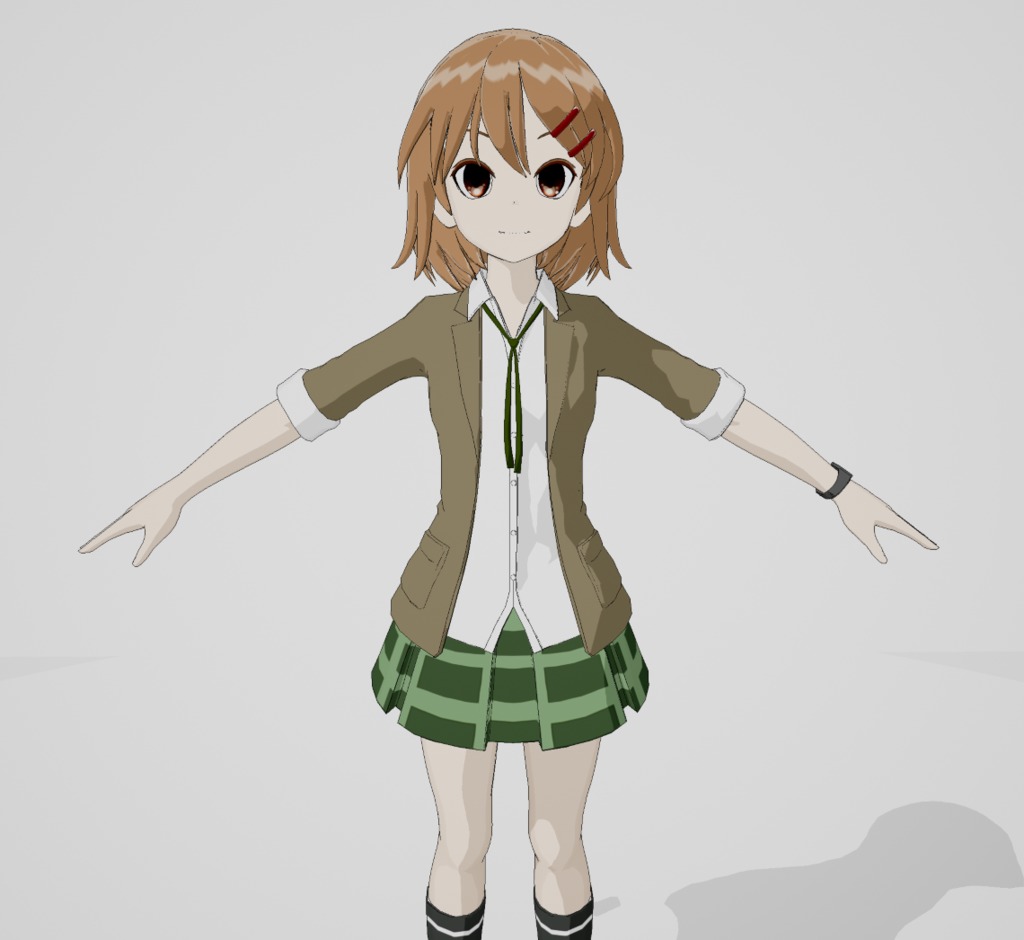
Color enhancement
One more thing we can do is the color enhancement. More specifically, we can adjust the contrast of images with “Color Grading” which is provided in post-process volume.
(I increased the contrast a bit.)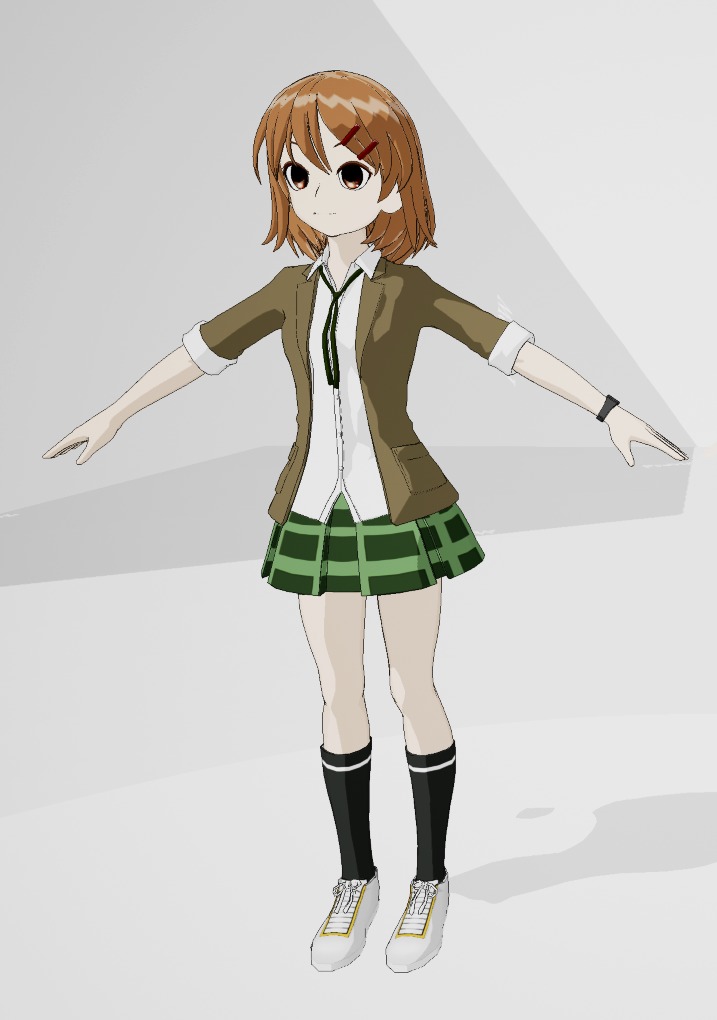
Final Result
Here’s a comparison of the model with only base color textures plugged into Emmisive channel and our result.
Reference
This tutorial is based on what I learned from the articles below. Credit goes to:
Comments